


20
Continental GT W12
5950cc
635bhp
23.3mpg
3.7s
If you’re going to have a Bentley Conti GT, there’s only really one engine to have. The W12. Superficially this isn’t right – we’ve often said the V8 makes more sense because it’s very nearly as potent (542bhp plays 626, only 0.4secs slower to 62mph), has an almost equally broad powerband, is more economical and arguably sounds better.
However, there is one compelling reason to have the big daddy motor. It’s built, along with the rest of the car, at Crewe. The V8 isn’t – it arrives on a pallet from Germany, a VW Group engine that also sees service in the Audi RS6 among others. The W12 twin turbo is unique to Bentley. So that’s the motor we’ve gone for: 626bhp and 664lb ft available from only 1,350rpm, a pair of twin scroll turbos, direct intercooling, 5,950cc of swept volume, both port and direct injection, quad camshafts, 48 valves and cylinder deactivation.
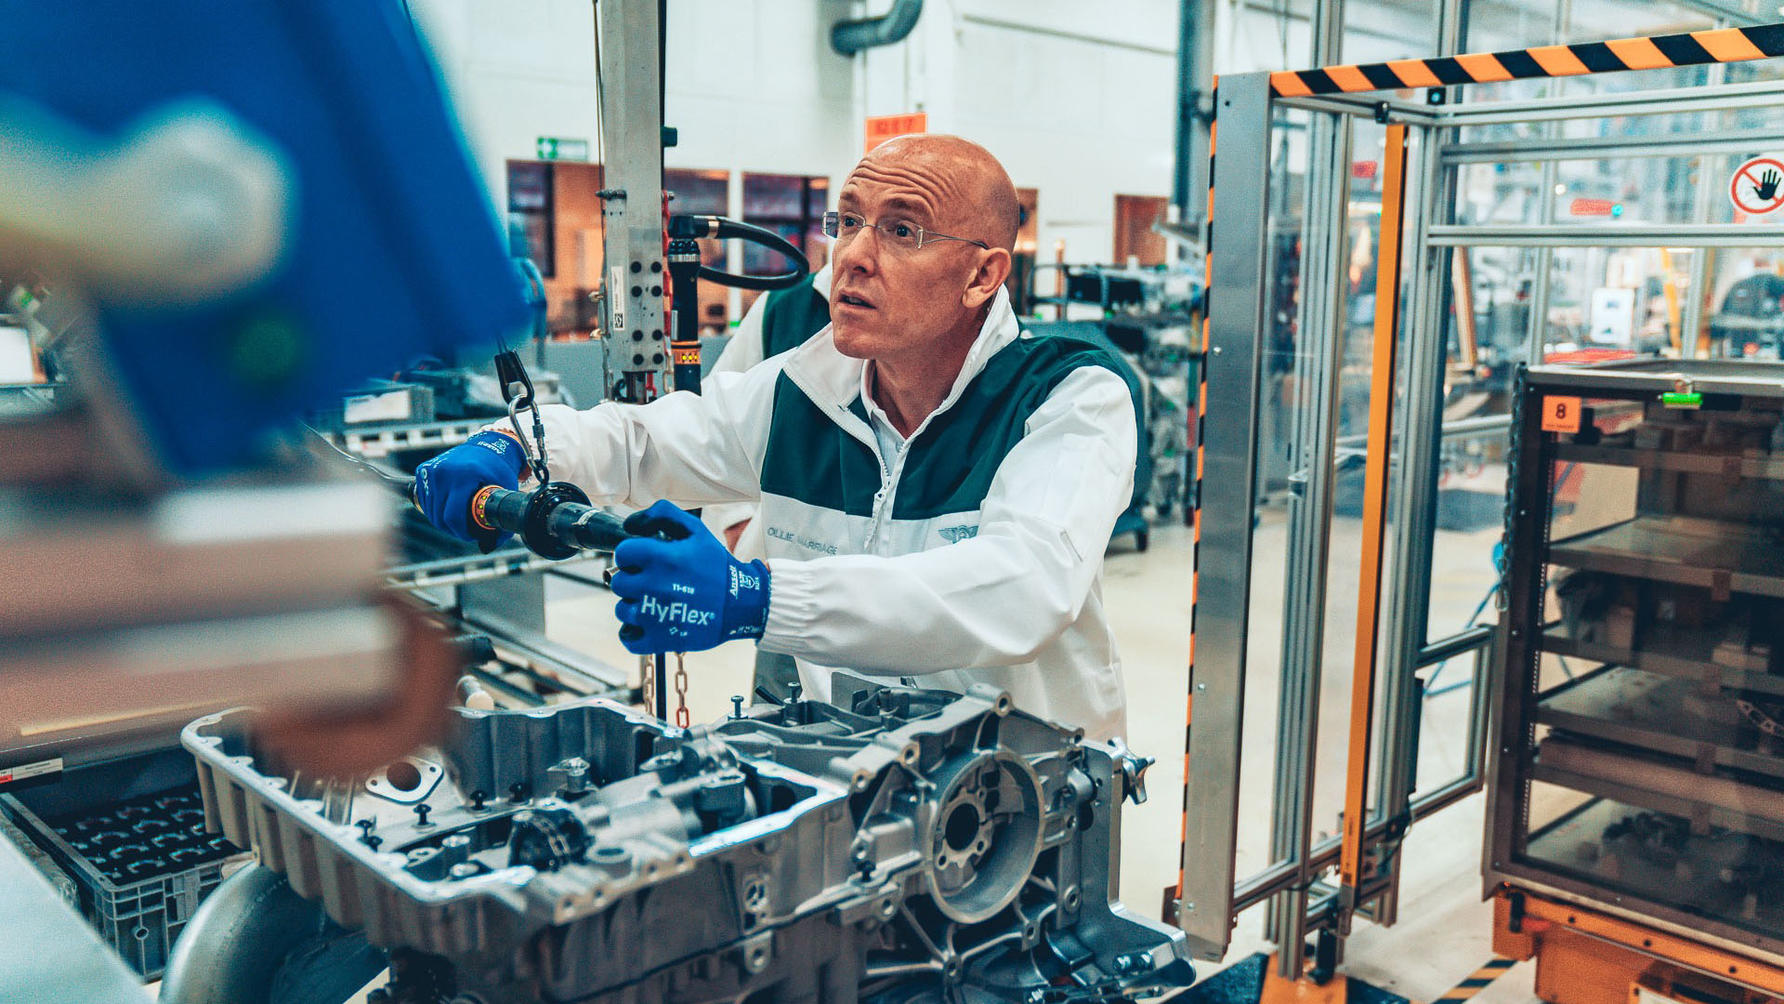
Quite a bit to get right across 16 stages of assembly on the production line. Which makes it more than a little daft that I’m going to help build the engine for my own car. I know, in reality I’m not going to get it wrong… but actually dropping the pistons into the bores isn’t nearly as simple as I expected...
That's the engine block up top. Yes, that is two narrow-angle offset-bore V6s mounted on a common crankshaft. True VW geeks will know that V6 better as the VR6, an engine developed 30 years ago for the Golf and Corrado coupe. The R stood for Reihenmotor – in-line or straight layout, basically making the point that the 15 degree separation angle between the banks and fact they shared a common cylinder head gave them elements of both straight and vee engine.
Anyway, a lot of development has happened since, with Bentley having paired two VR6s together for the original Continental GT back in 2003. Power has climbed 75bhp from then until now, but the main advantage is that the quad-bank layout is very compact – Bentley claims its 24 per cent shorter than a conventional V12.
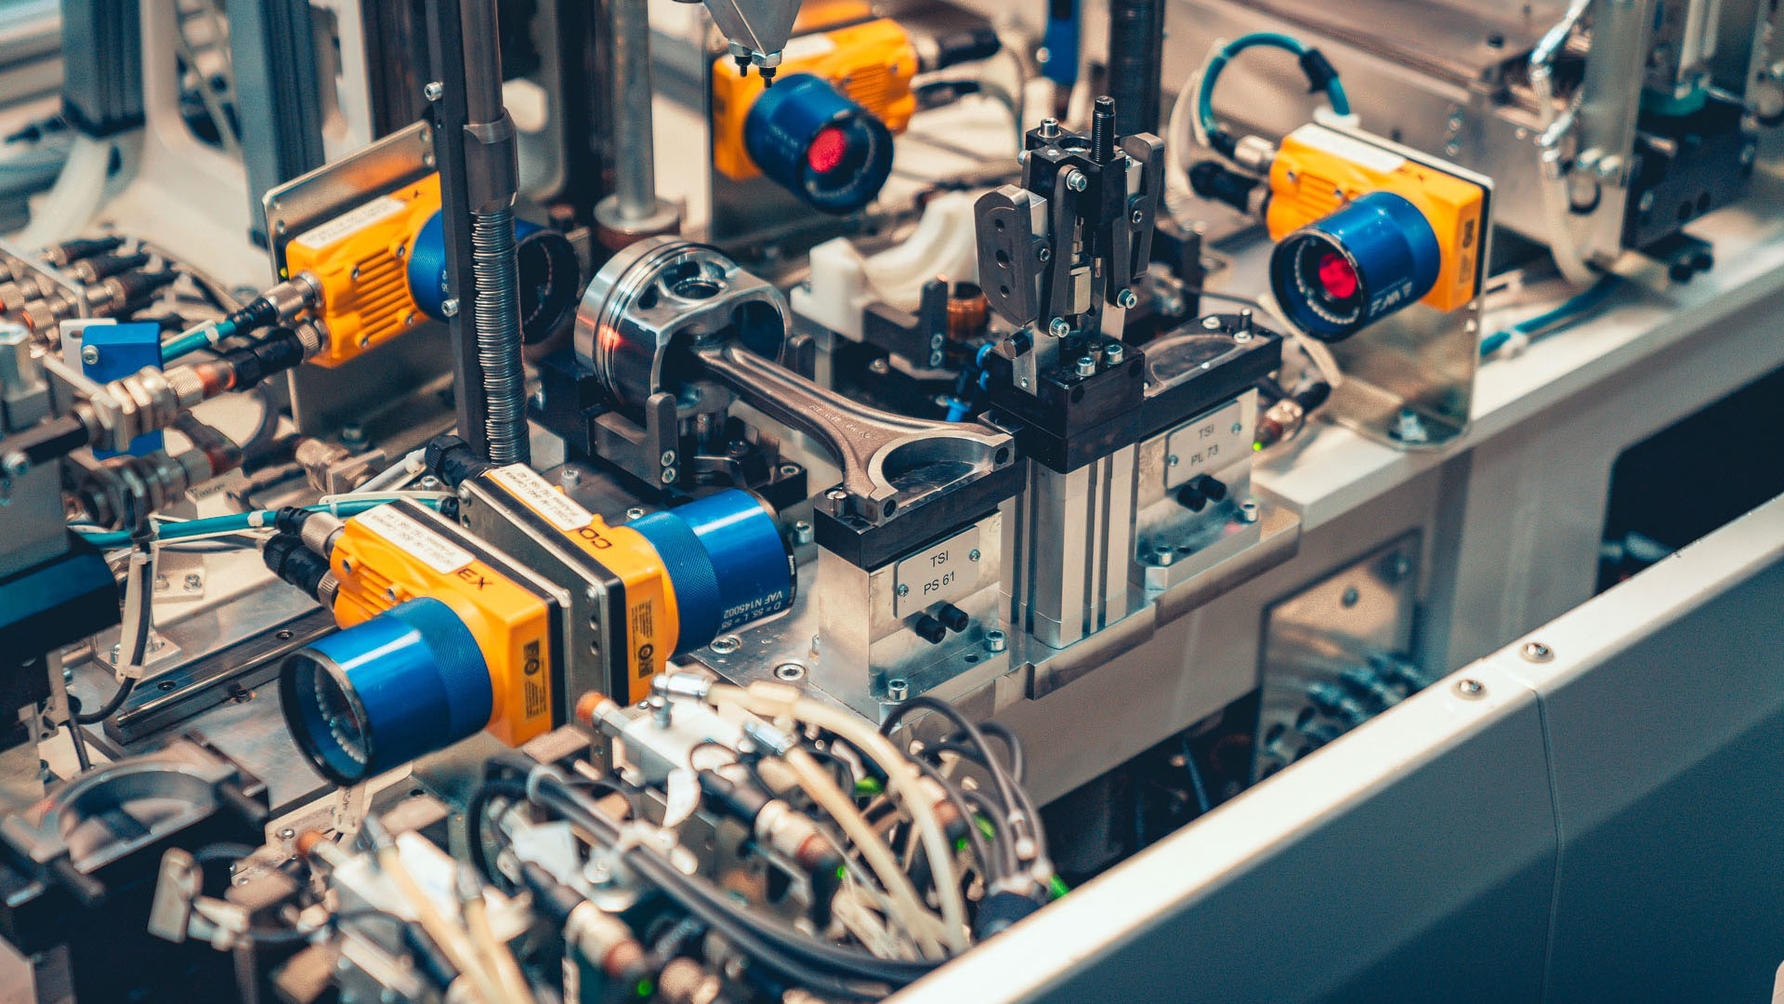
For assembly, this is the starting point, the block carried on a trolley and able to rotate to allow people to work on it from all angles.
I’m not going to bore you with every single assembly step, not least since I only worked on 8 of the 16 stations, and most of those earlier in the assembly process, where the bigger bits go together.
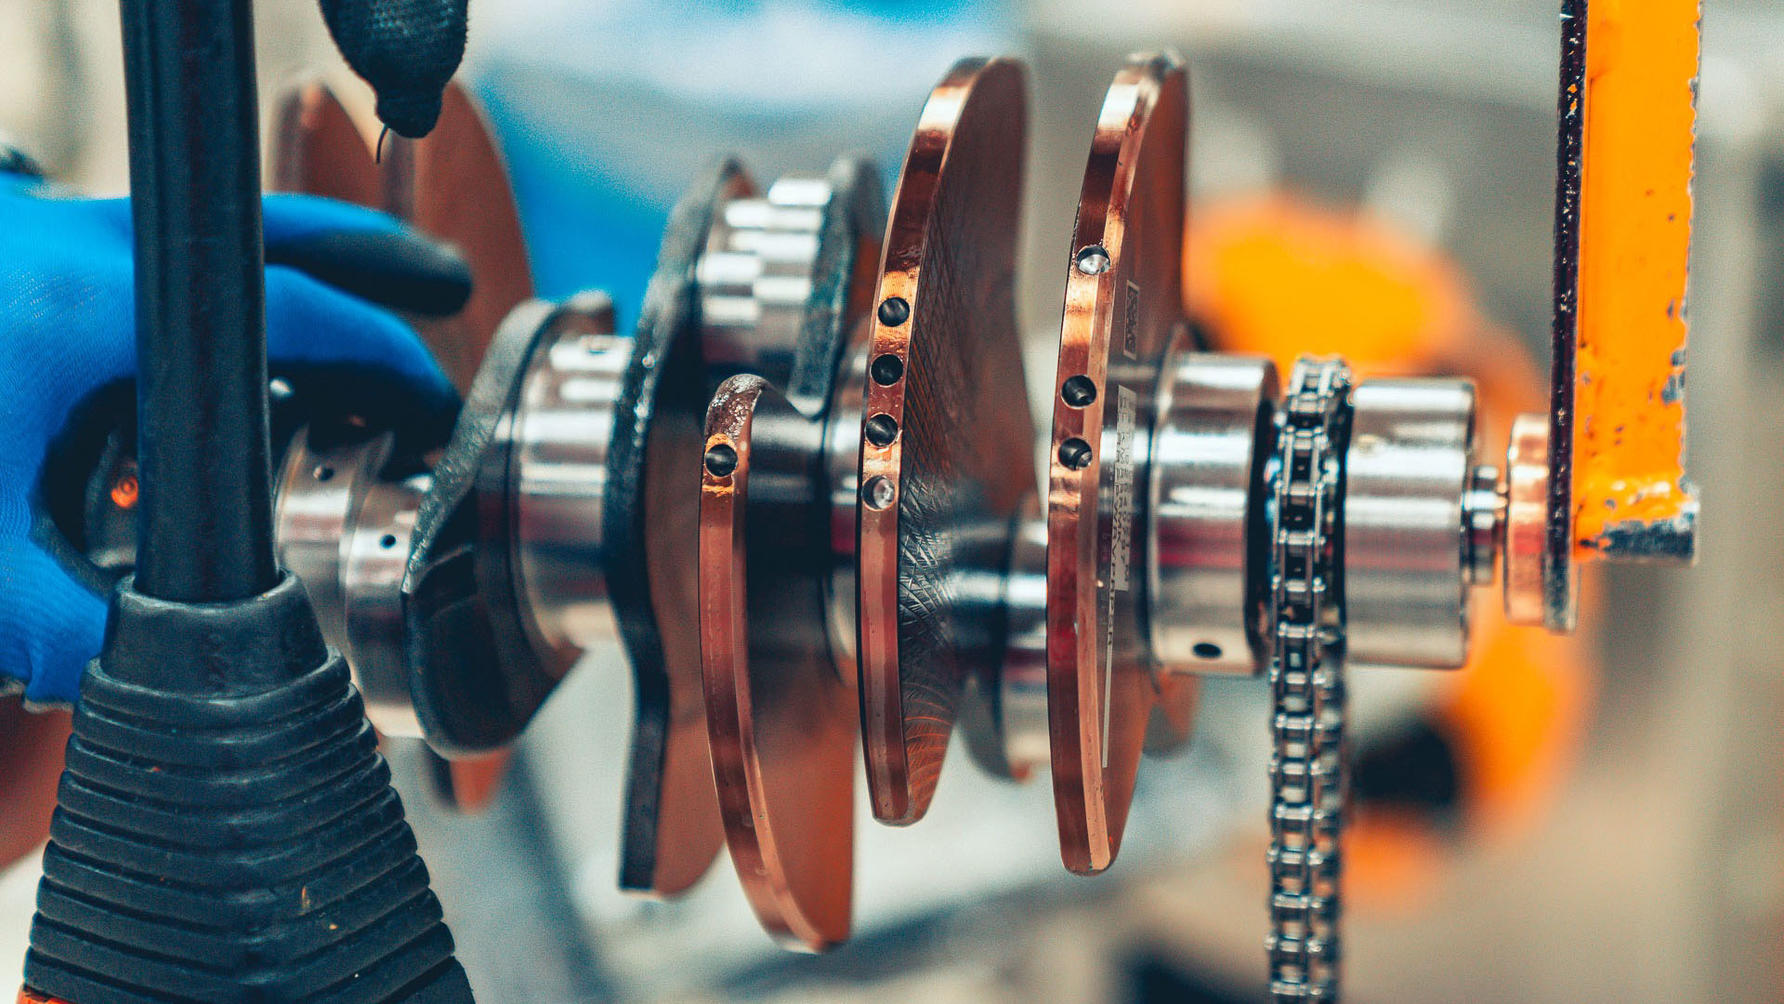
Like this. It’s a detail of the crankshaft. See the holes? They’ve been drilled in already to ensure the crankshaft is perfectly balanced. But that’s not the only thing that has to be balanced…
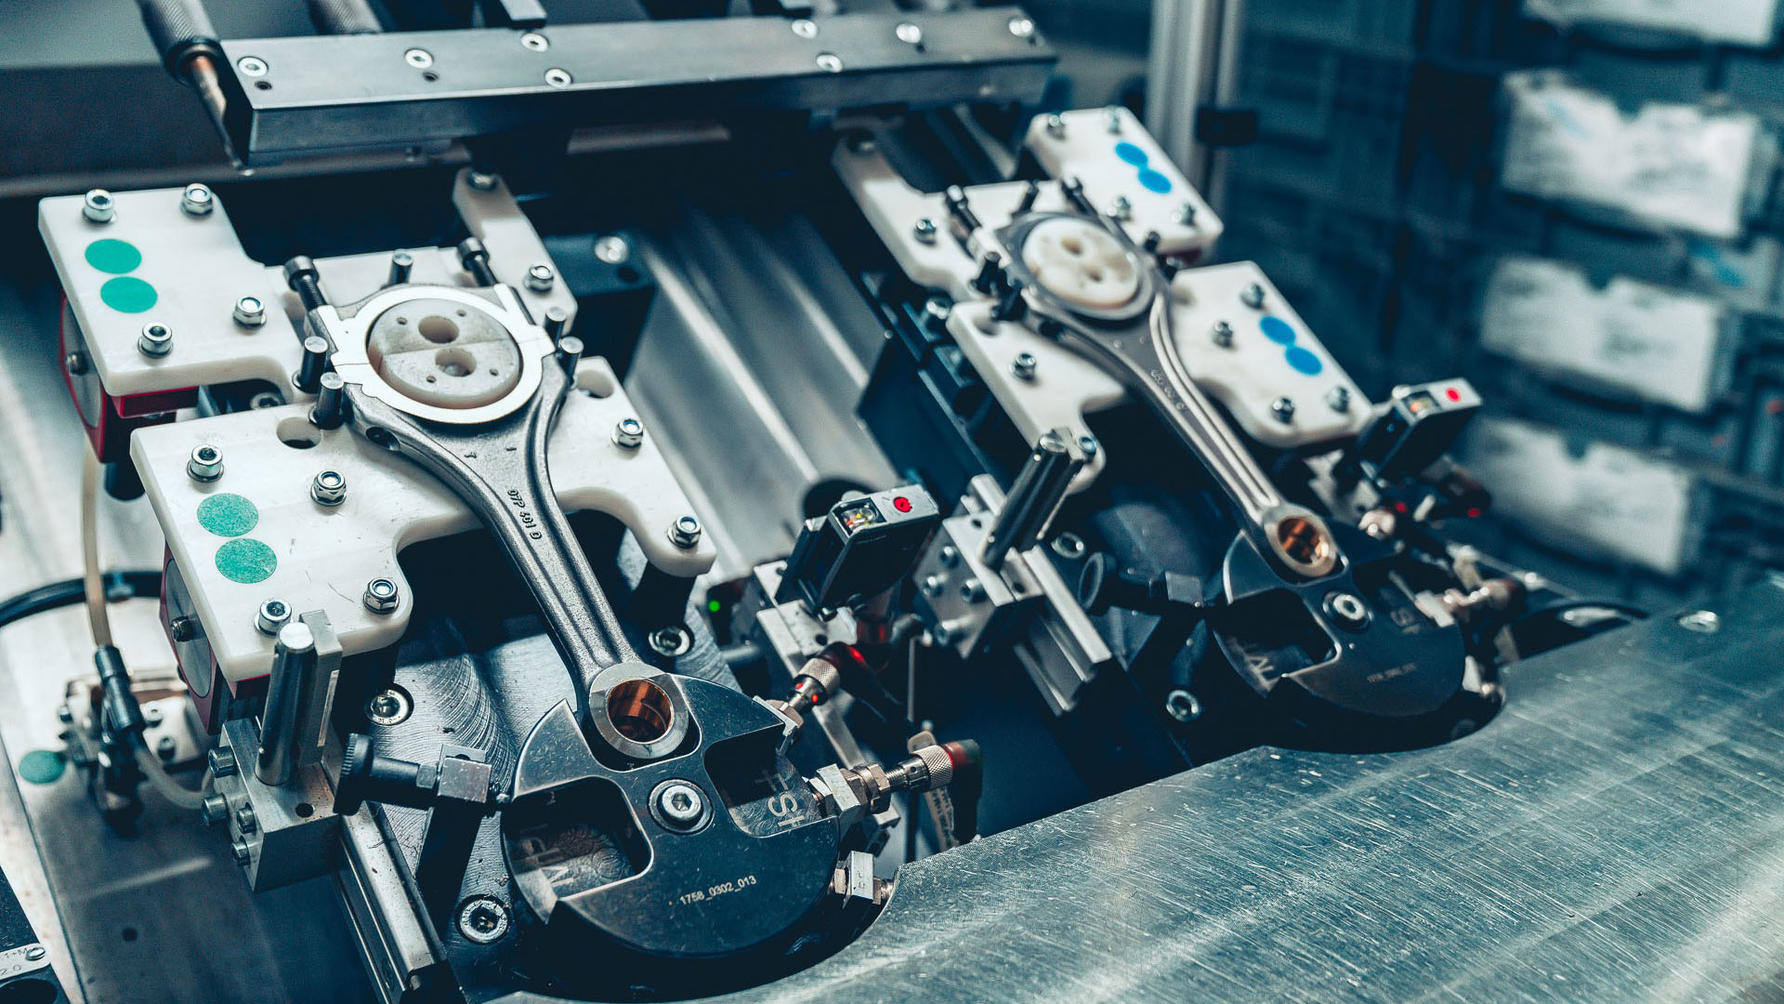
Here’s the conrod. Now this is quite fun. Each conrod is forged as a single piece, then scored (at the top, where the conrod meets the cap) to introduce a point of weakness. This machine then snaps the conrod at that point, resulting in uneven breaks at either end.
Turns out this results in a more precise and durable fit when they’re bolted back together around the crankshaft.
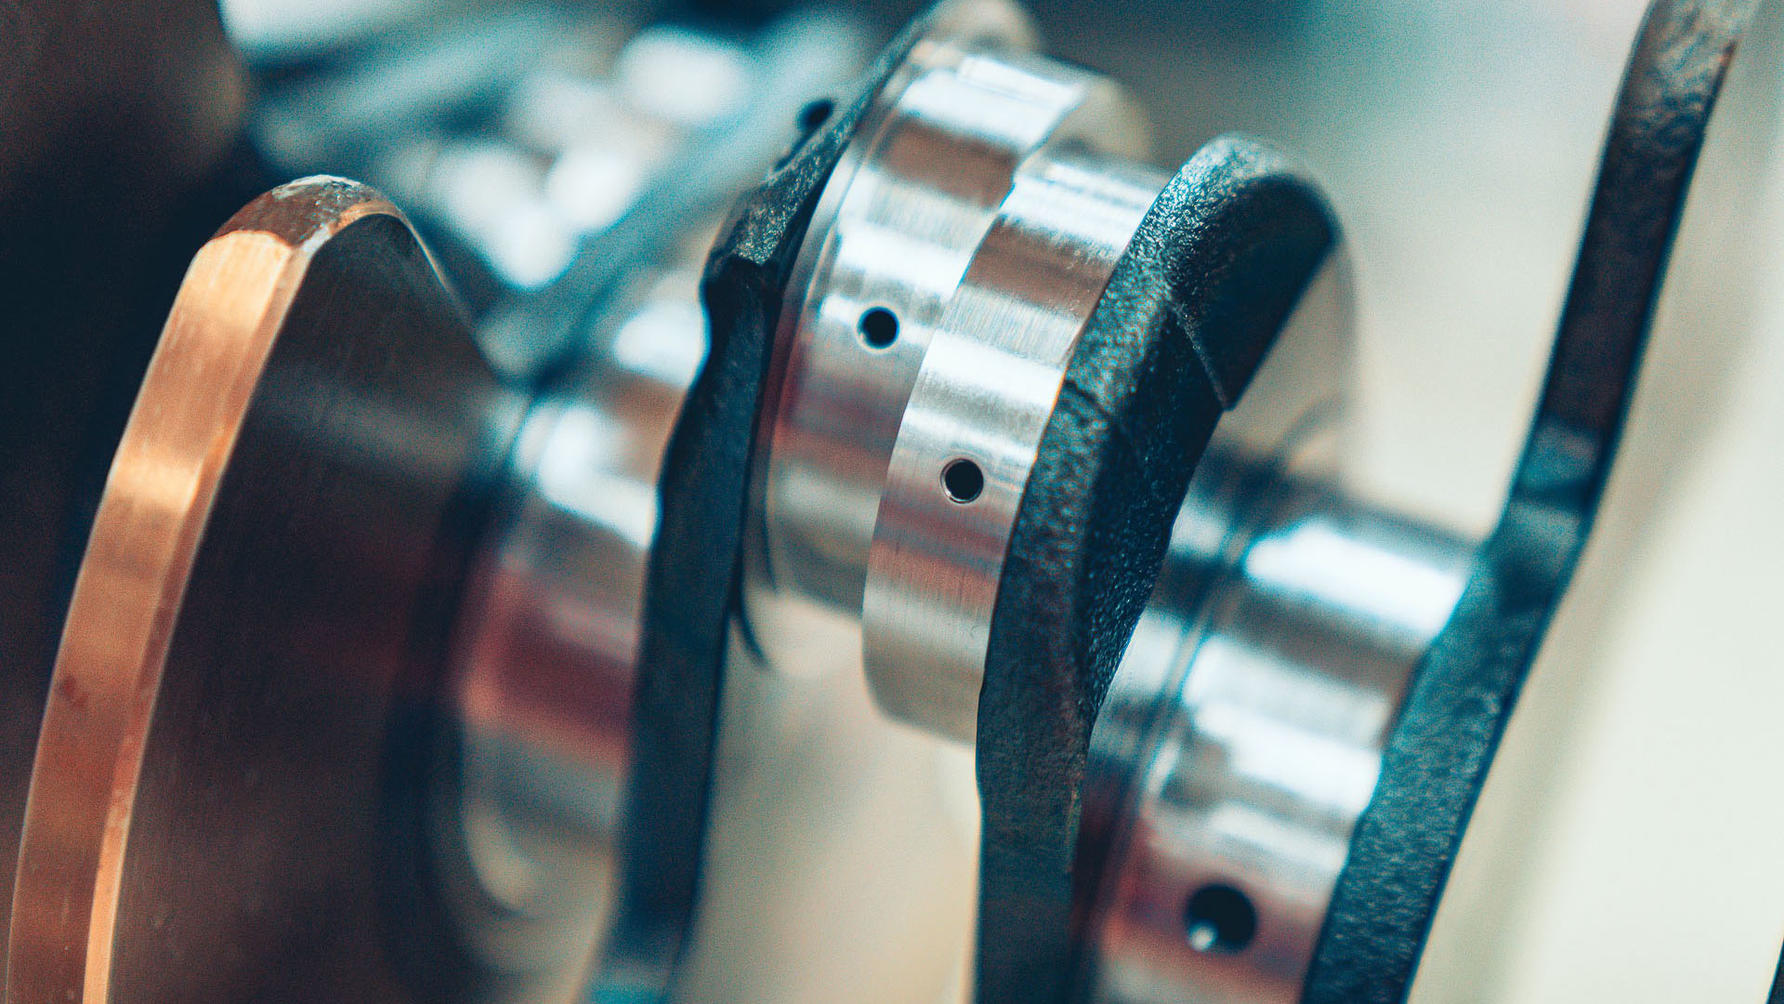
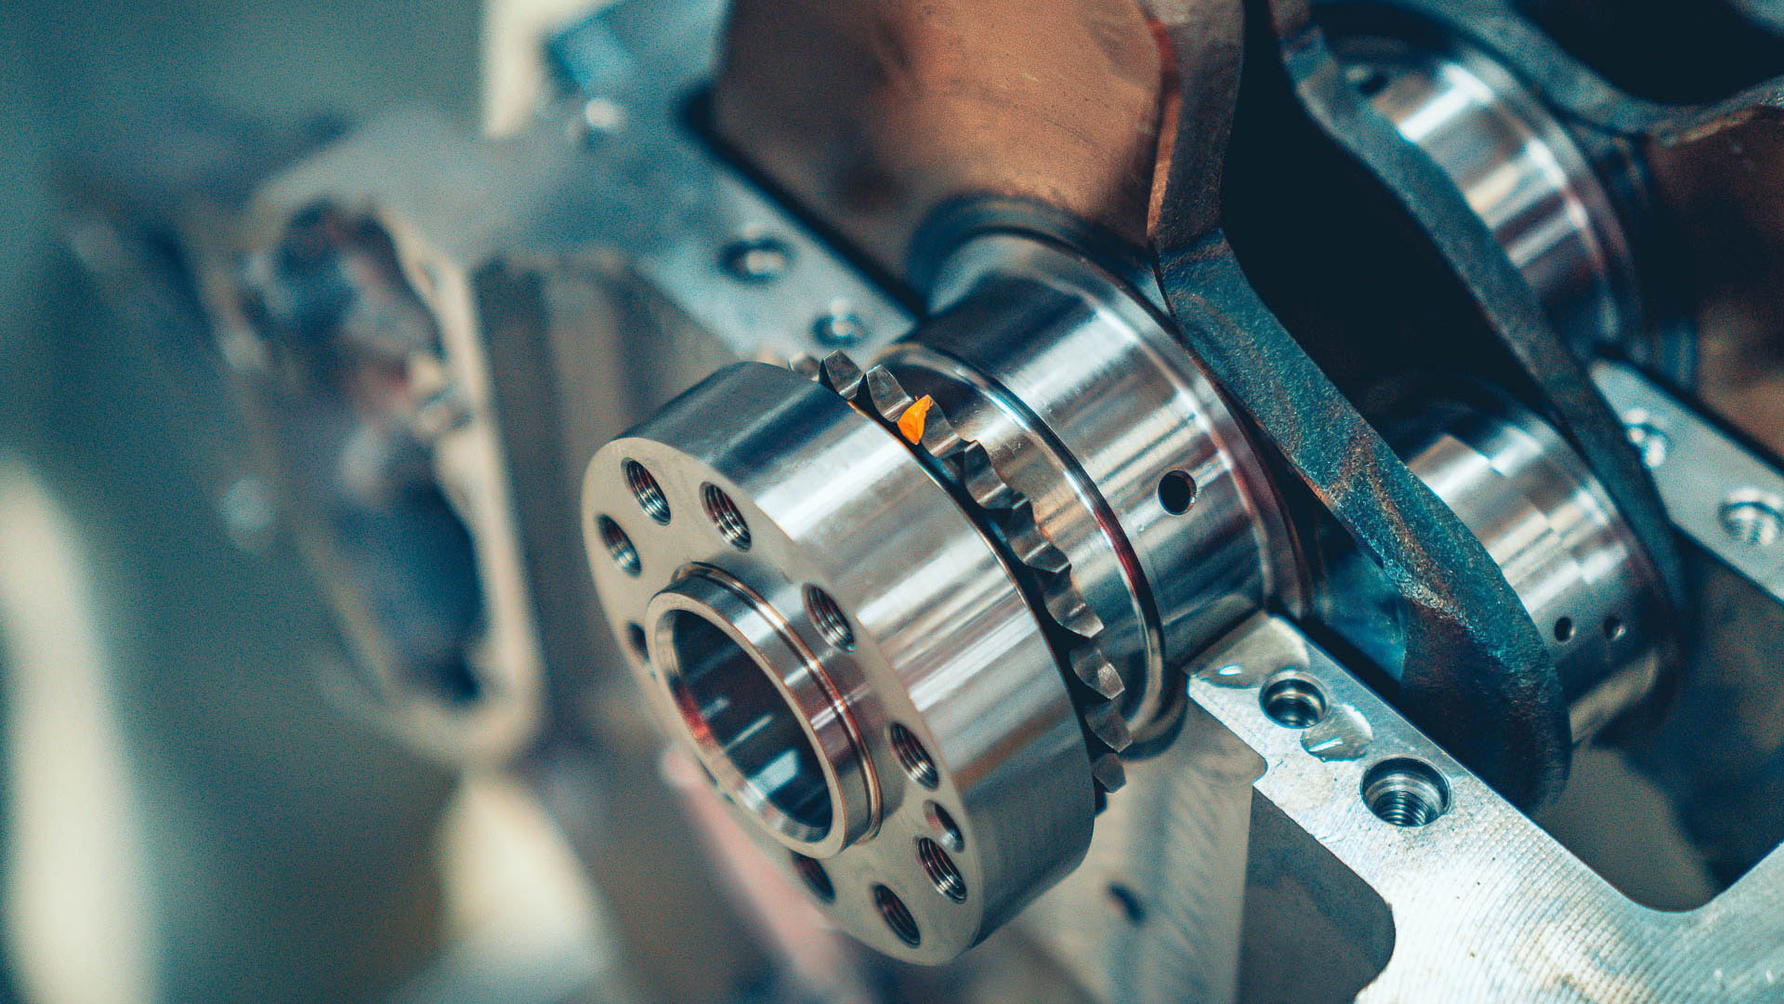
Another detail of the crankshaft. That 24 per cent shorter engine means 12 conrods have to be squeezed on to a relatively short crankshaft. This is how close the conrods are mounted – one around each abutting disc. That’s a lot of thrashing metal moving around with millimetric precision.
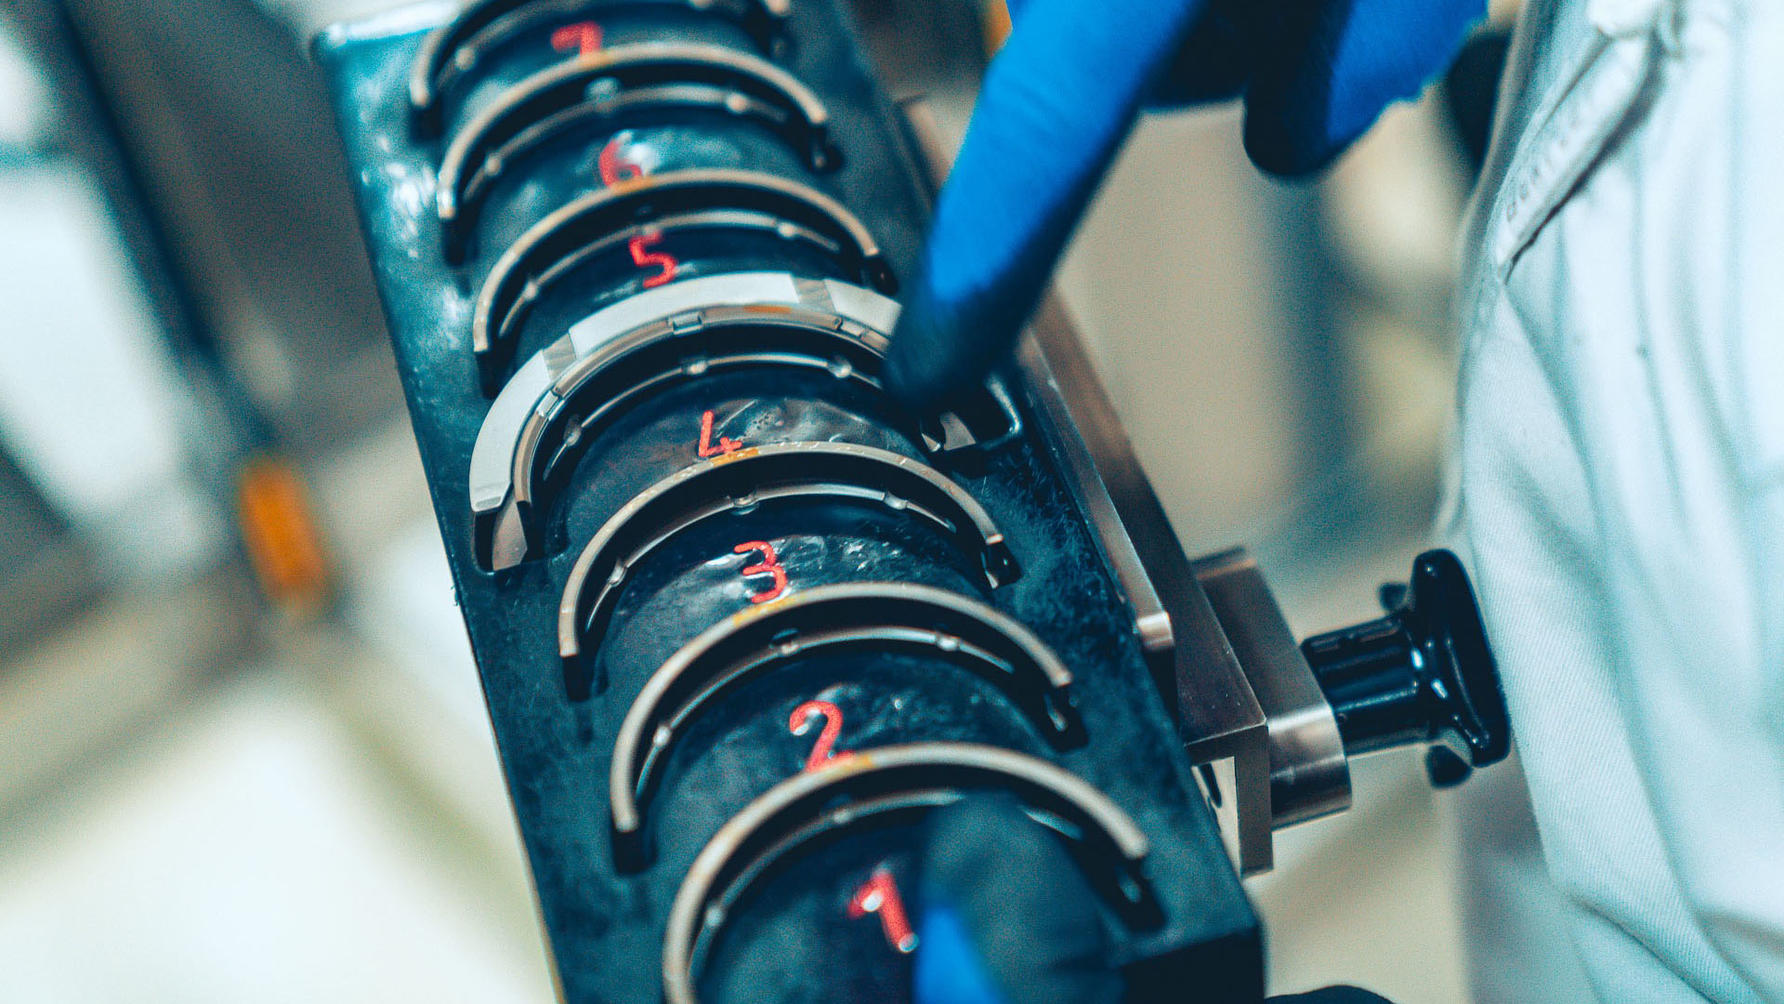
These are the bearing cups that sit in the bottom of the engine block and support the crankshaft. Each has a designated position along the block…
… and has to be pressed in by hand.
They’re then liberally lubricated…
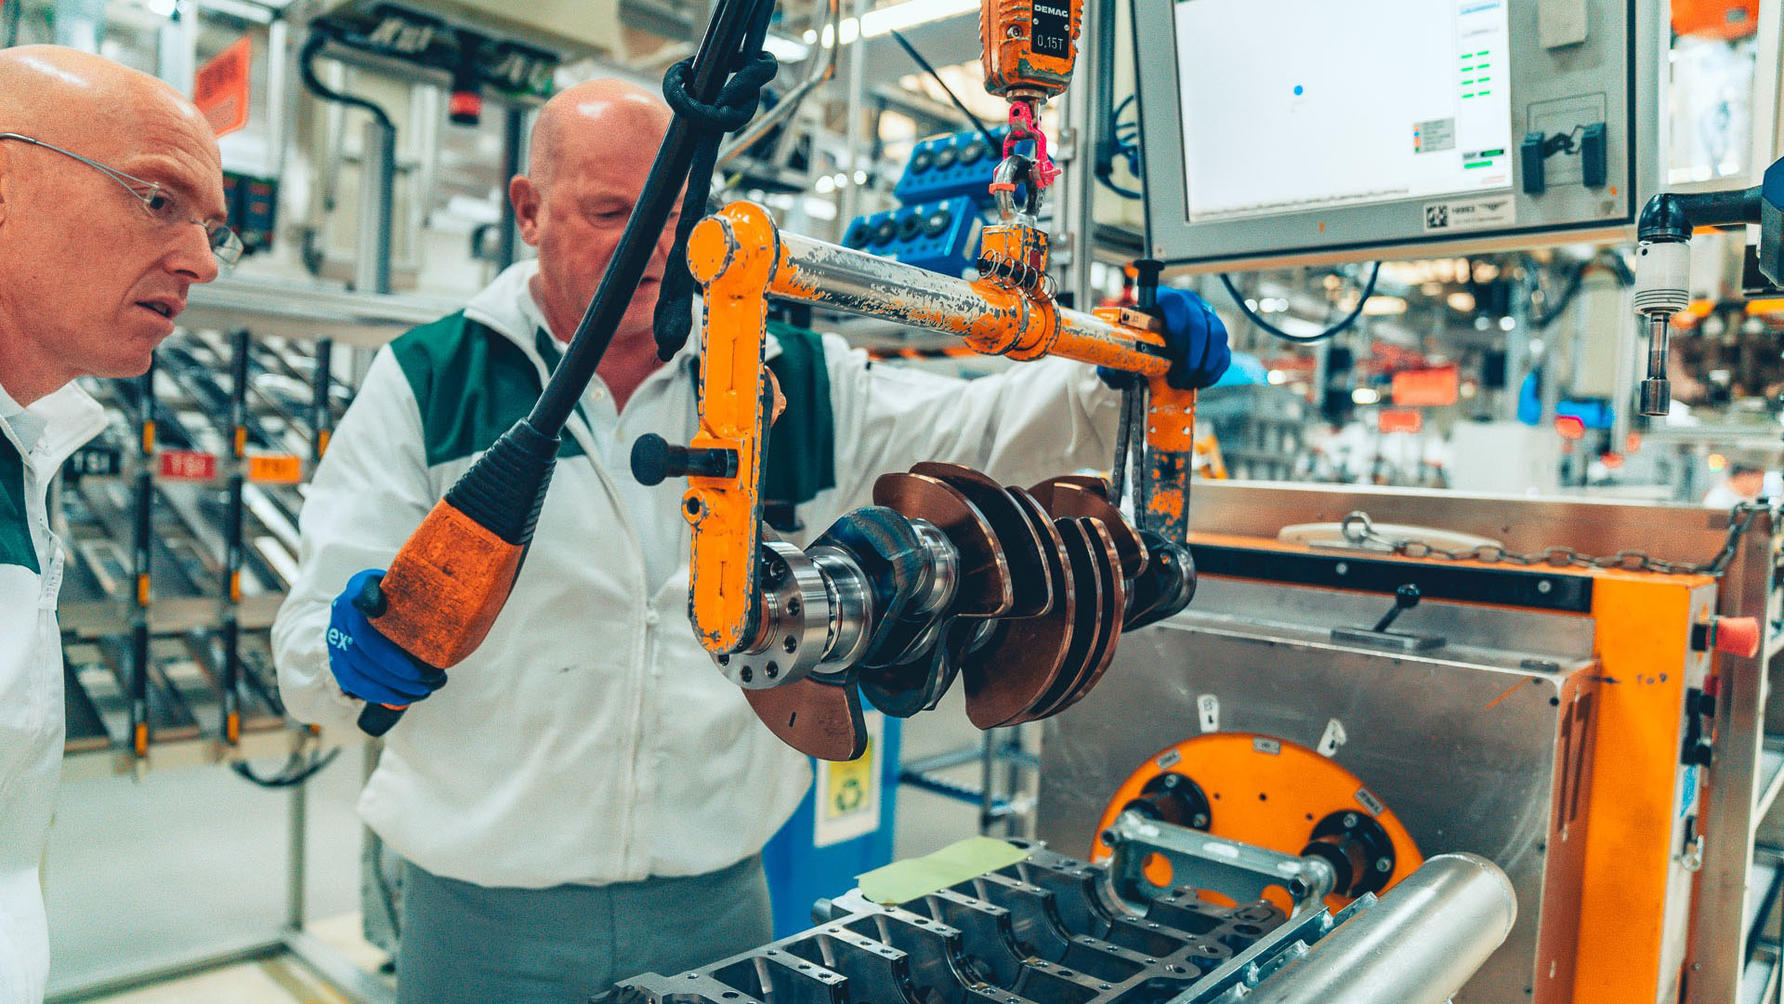
…and the crankshaft is lowered into place. This requires a small crane and a lot of accuracy. You don’t want the weighted ends to scuff the sides as it’s lowered into position.
Top dead centre is marked with a pen to aid alignment and positioning further on in the process.

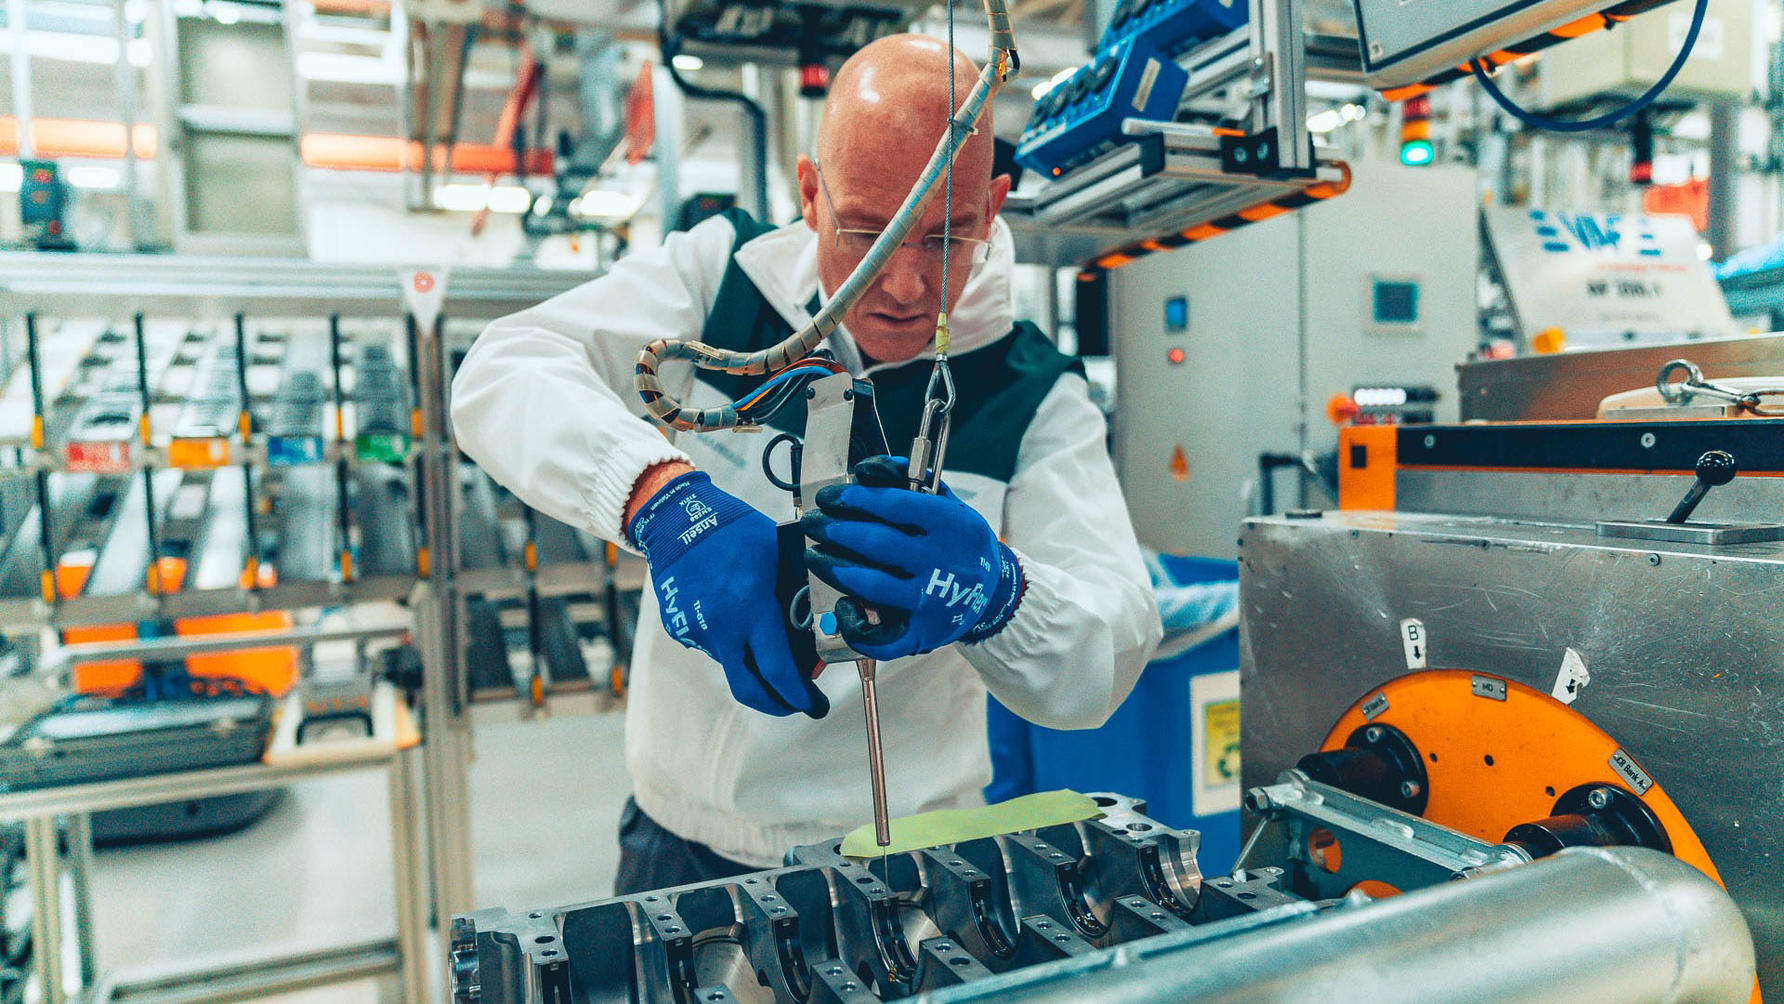
And then we move on to the pistons. First the heads have to be joined to the conrods with a gudgeon pin. You don’t just hit that home with a hammer. Instead you carefully lay the piston and conrod into a mould…
…then the machine takes over, slotting the pin home and again checking the weights and measures and selecting the right bearing to balance the piston perfectly.
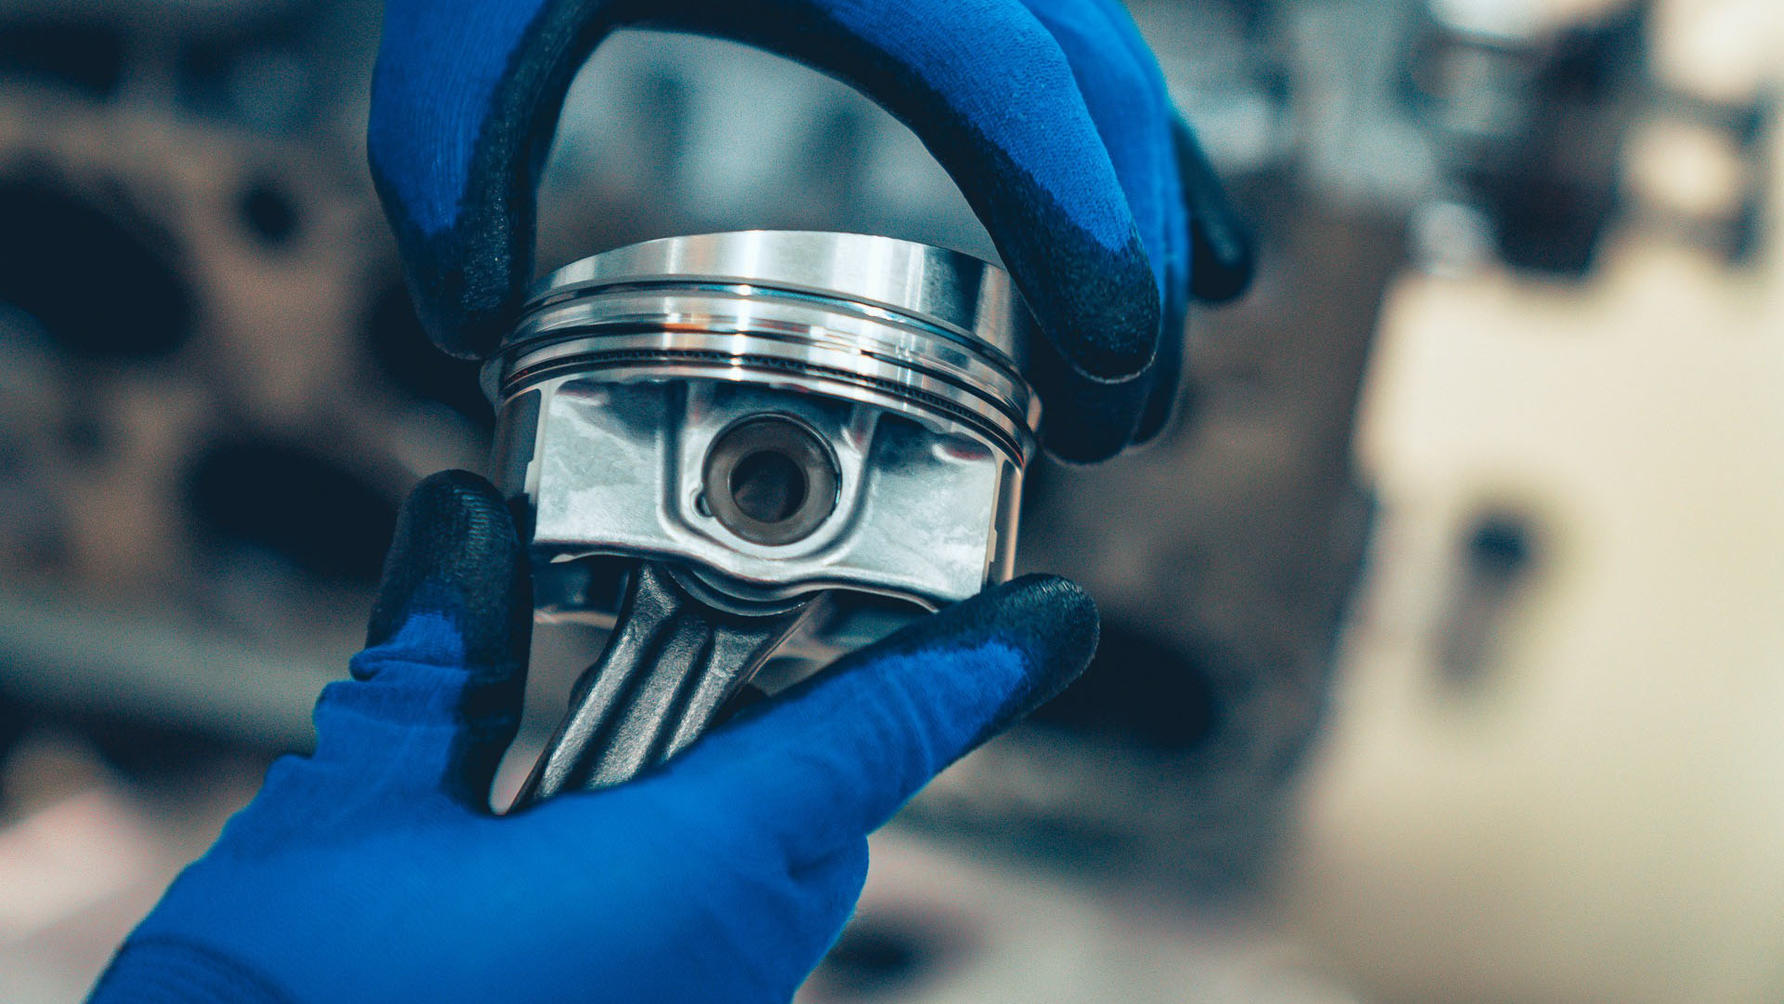
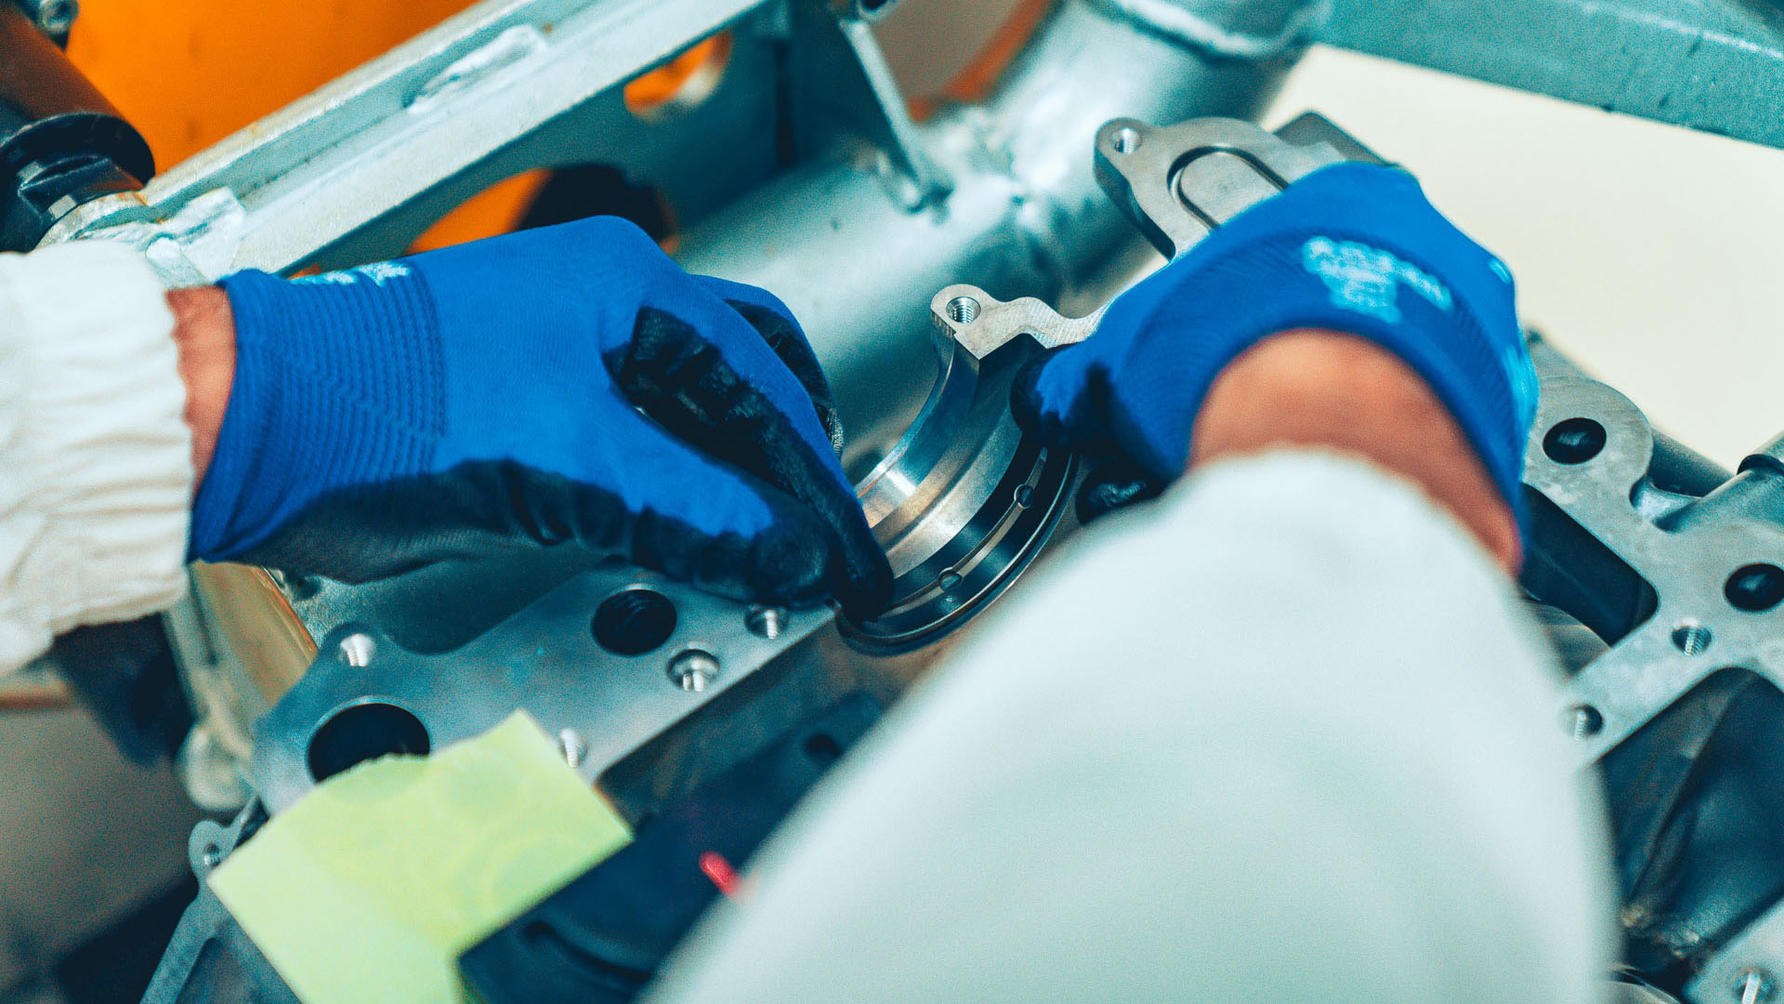
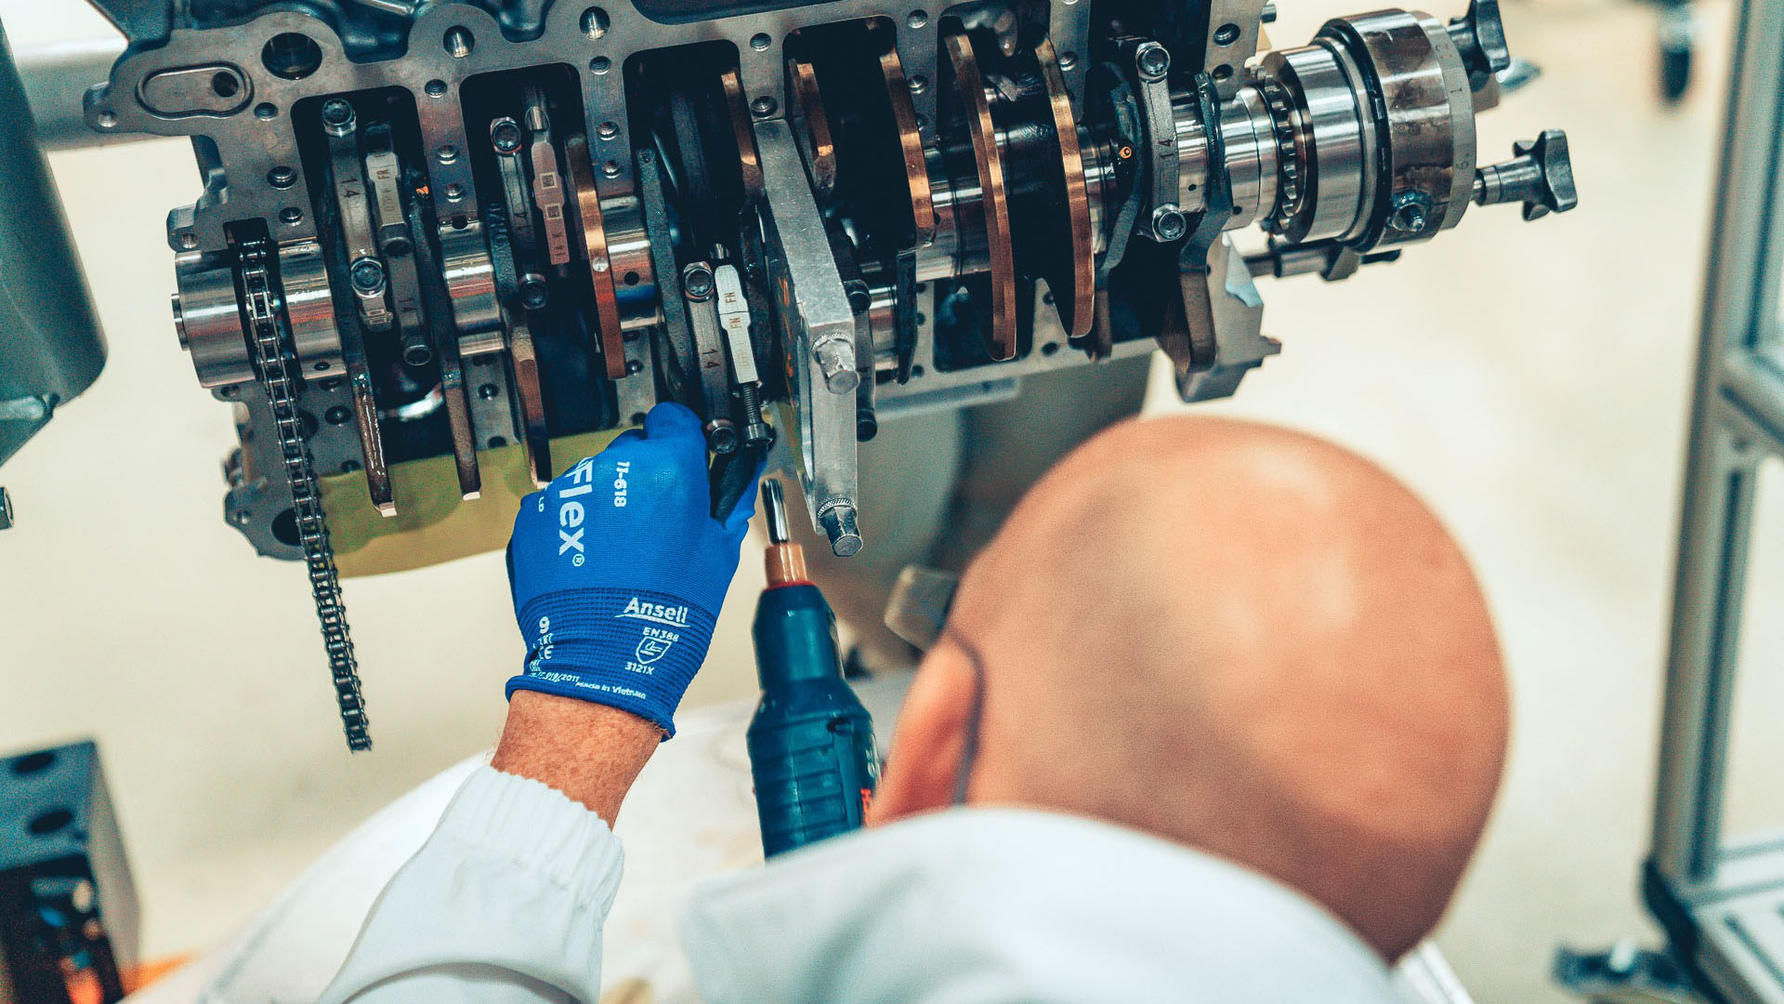
At which point it’s time for some human intervention again. See the piston rings around the edge? Those all have to be correctly spun into a particular position and then held there while…
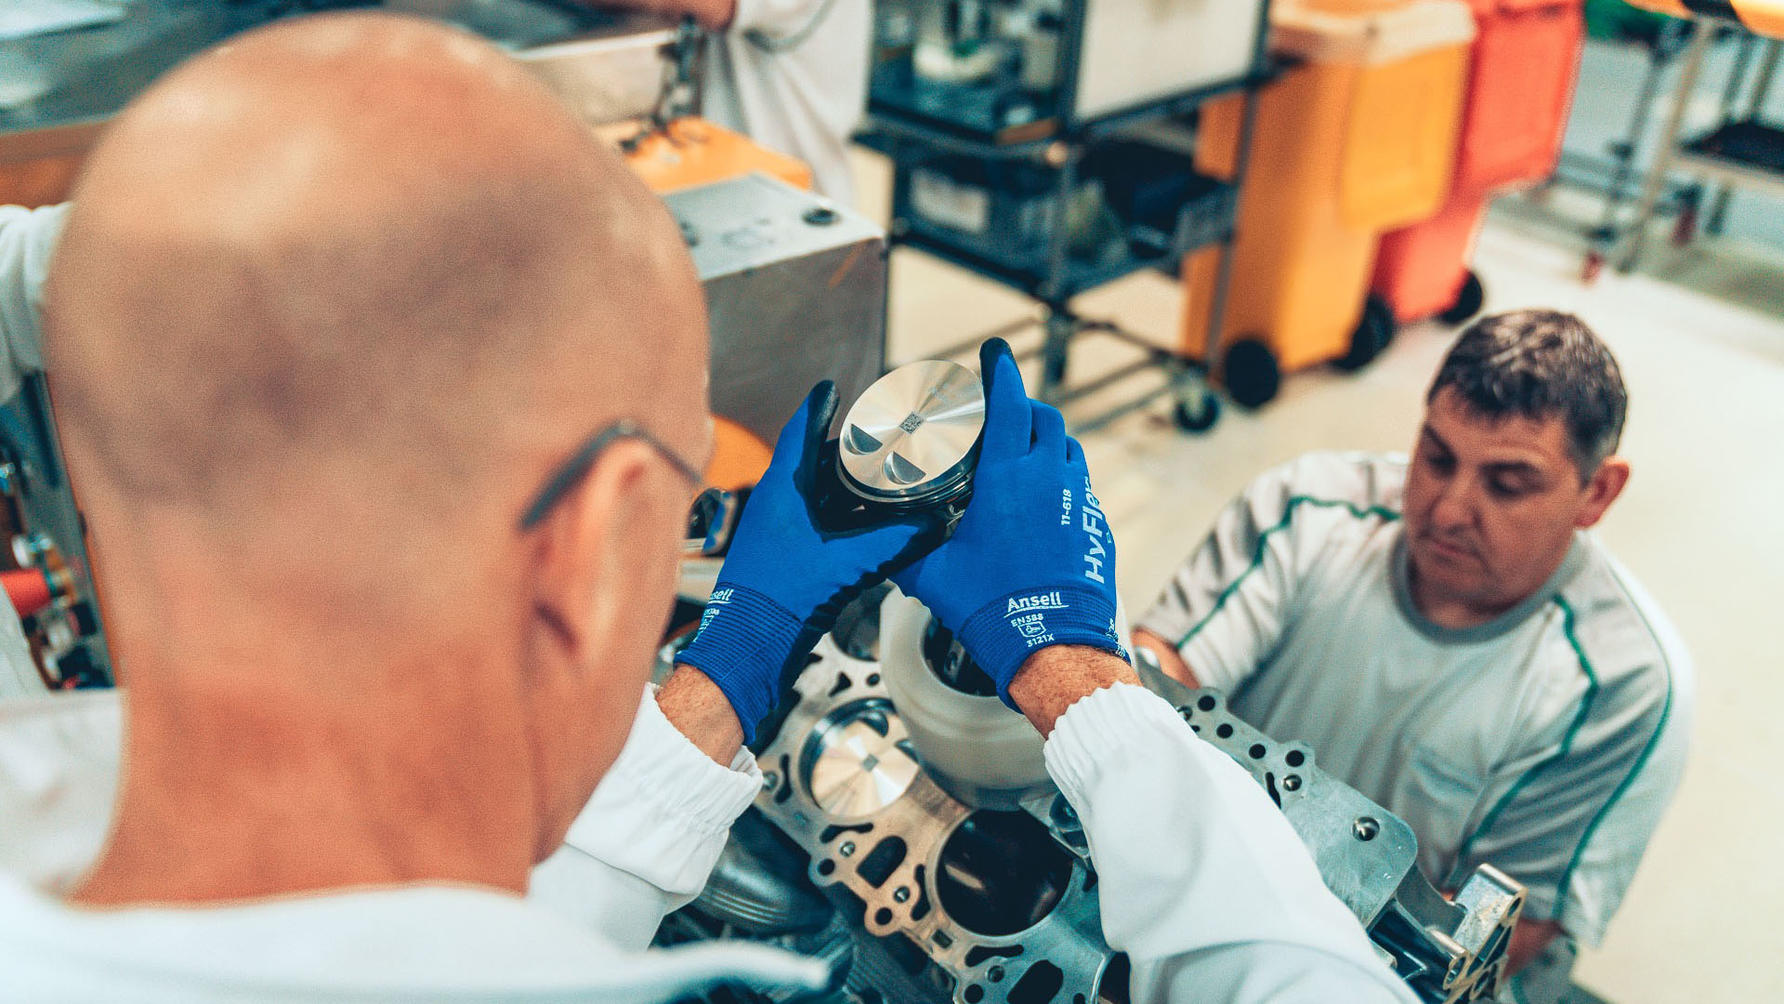
…the piston is dropped into the cylinder bore. This is not nearly as easy as it sounds because the fit is very, very snug. The nylon tooling you see on top of the block helps align the piston perfectly, but holding the rings in place is one of those dastardly little jobs that takes a very steady, practised hand, not to mention a push at the end so that the conrod top snugs in against the crankshaft bottom.
Blue guides are attached to the conrod to help guide it down the bores to the bottom end. The square edged plate you see is temporary – only there to hold the crankshaft in place until the engine is turned over and the bottom end and sump attached.
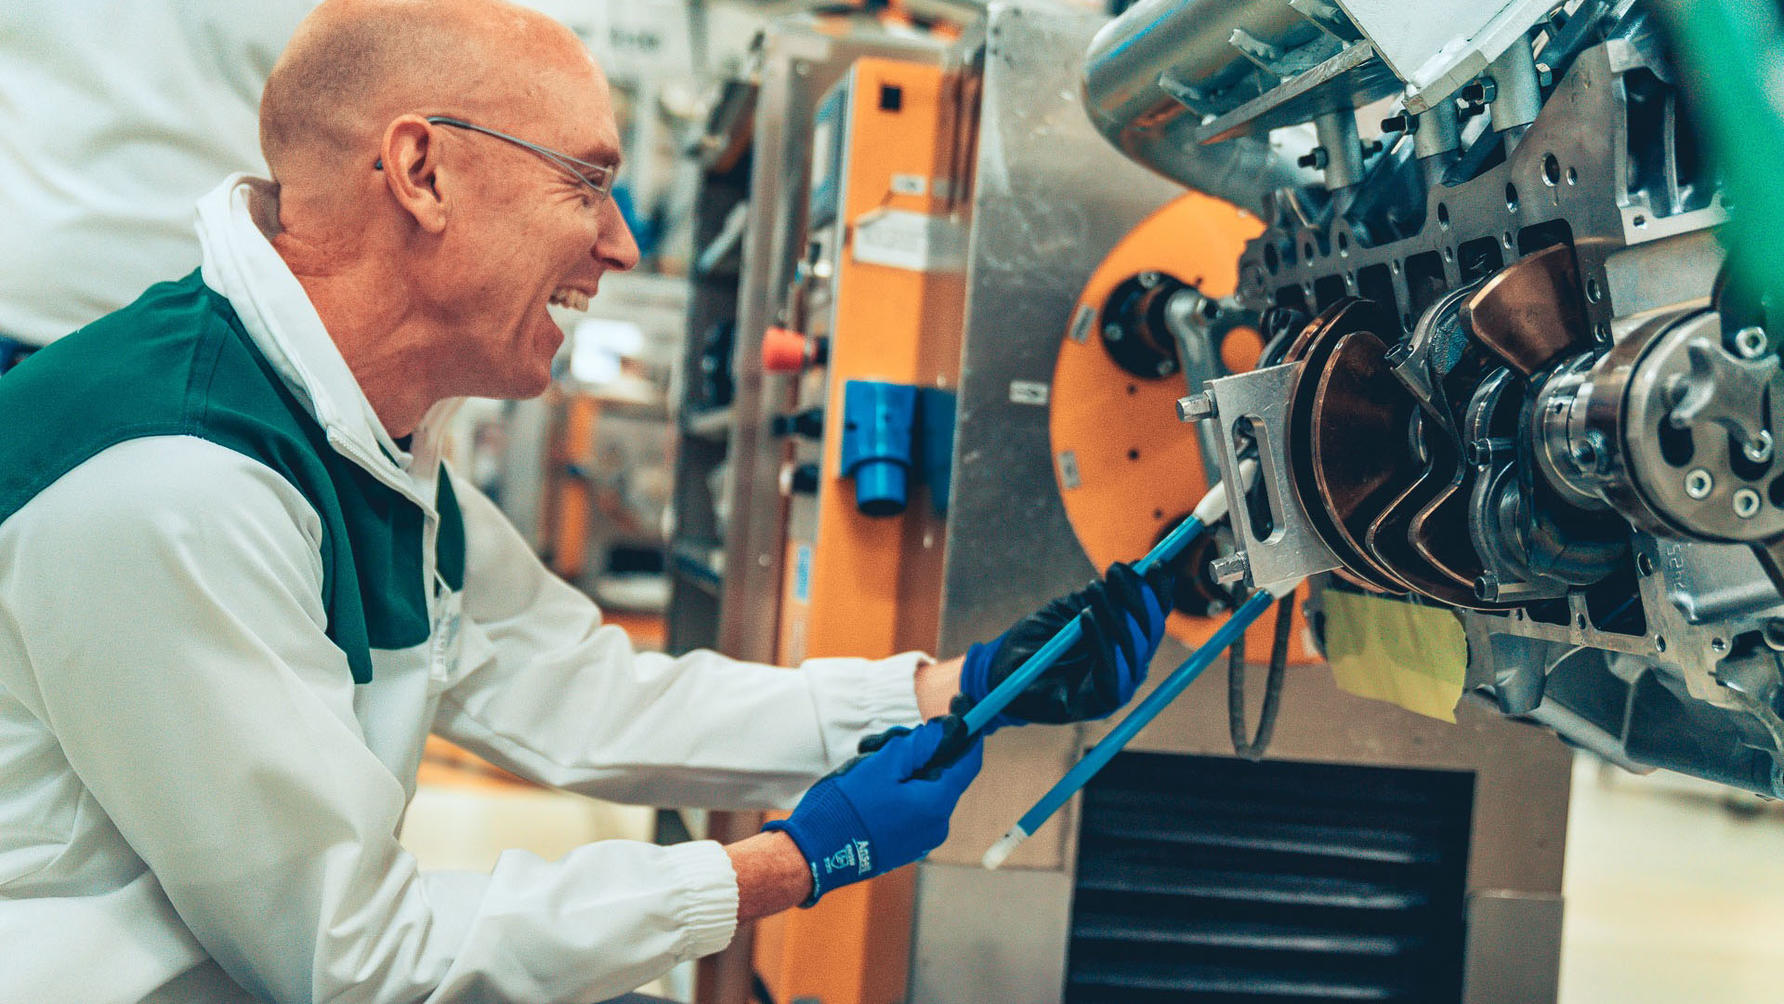
Next the snapped conrod caps are screwed back on, hopefully never to come off. Even allowing for my workmanship.
That done it’s time to fit the bottom end and sump.
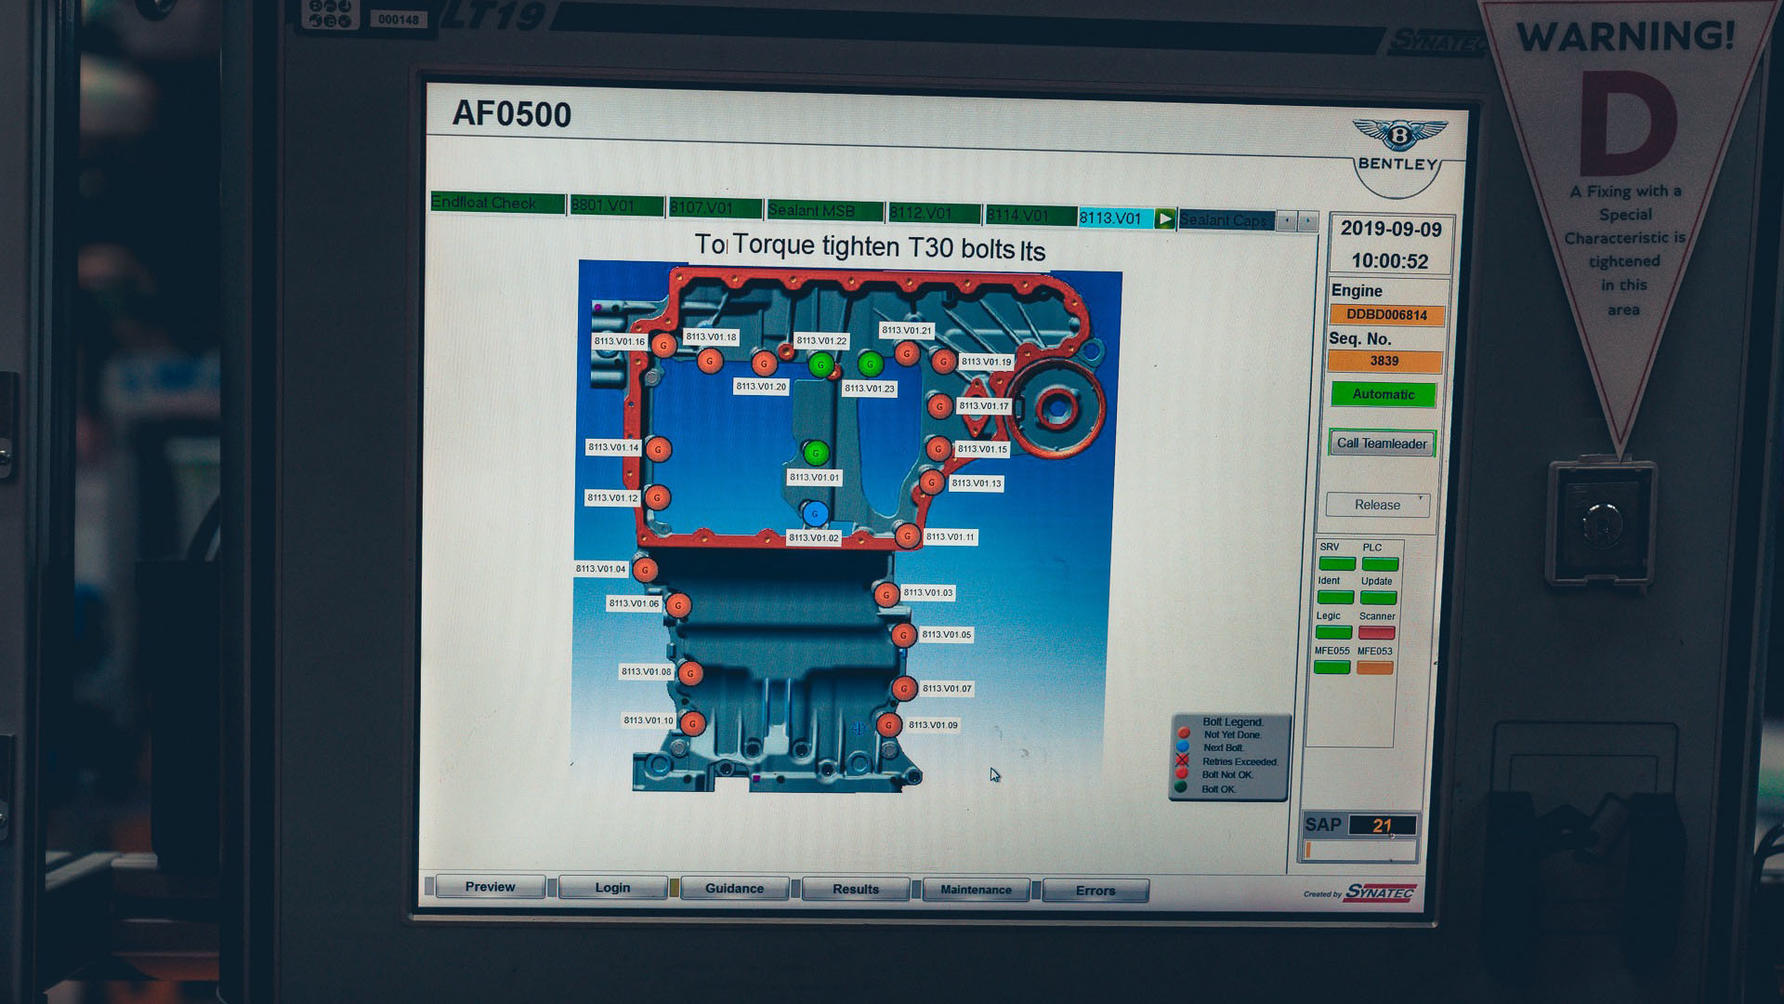
The bolts all have to be tightened in a particular order, and only once a machine has applied glue to the surfaces to ensure a perfect seal. You can’t over or under-tighten the bolts as you use tools with specific torque settings that are linked to the trolley’s computer. Release too early and you’ll be told to go again.
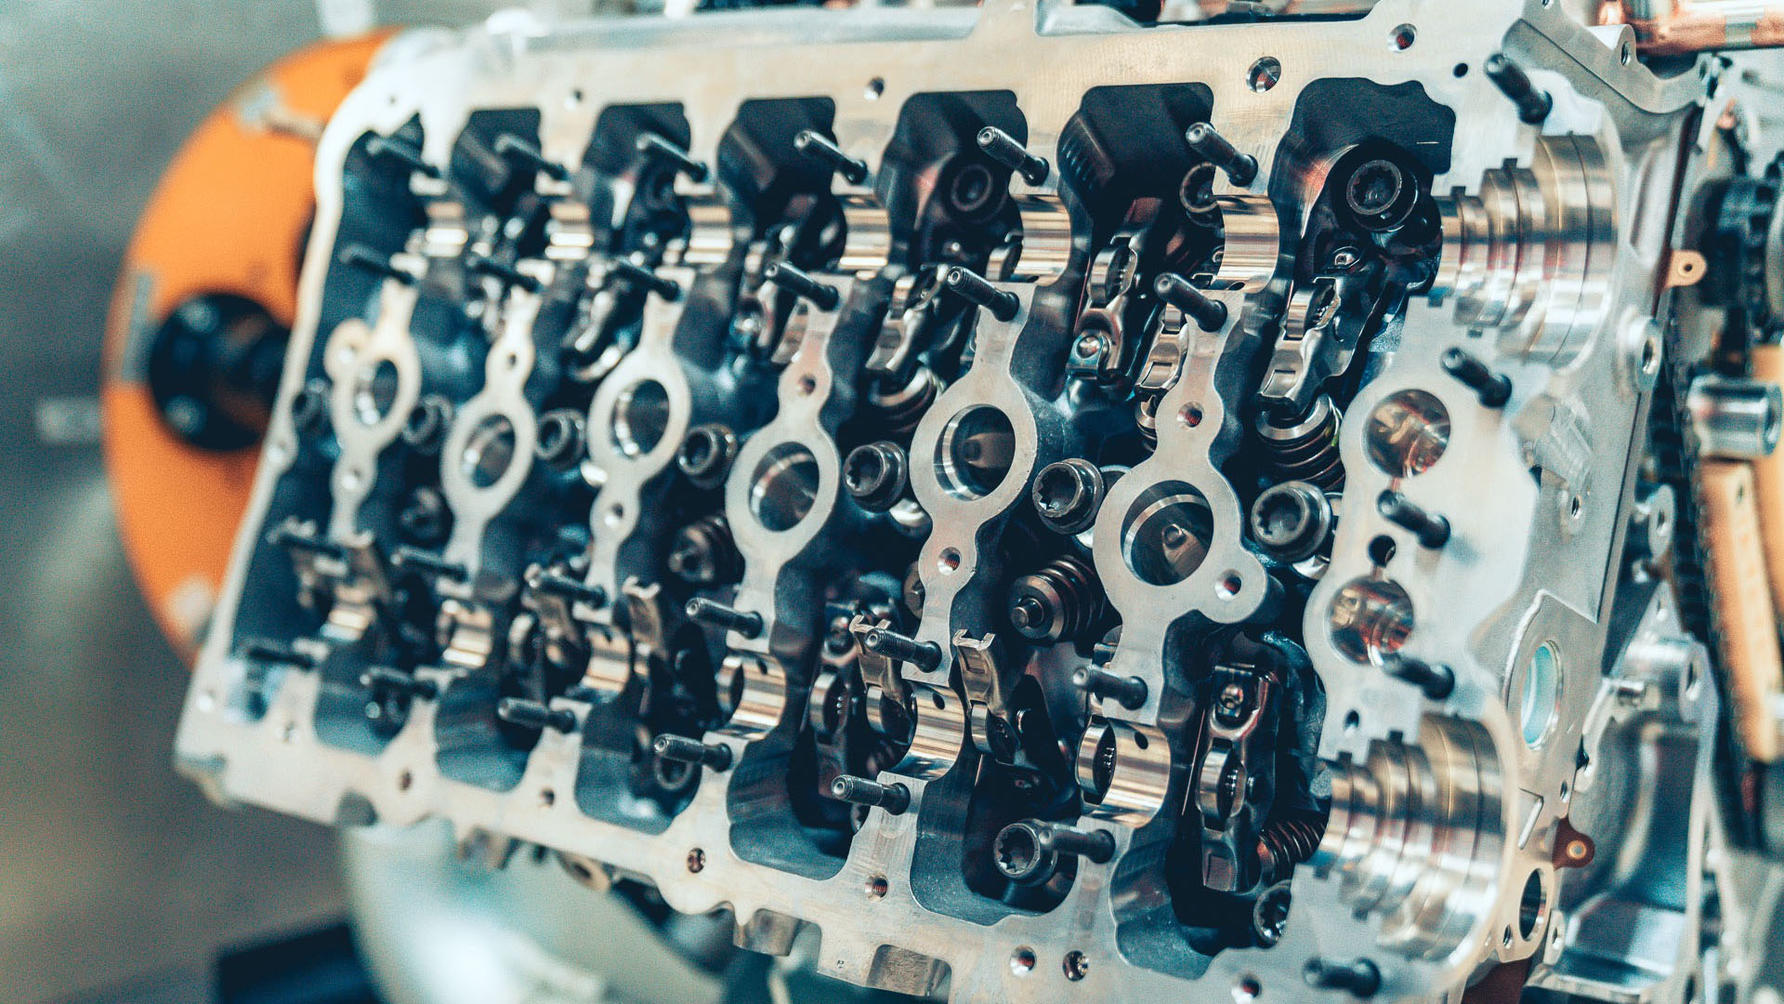
The engine is then turned over and the heads and valvetrain are fitted. Having seen how fiddly I found the conrods and piston rings, I was encouraged not to get involved with the valves and camshafts.
Not least because the W12 has cylinder shut-off, so the cams on that side (the left bank, I think, but am I looking at it upside down?) have a different profile. I’d assumed the valves are just left open when that bank shuts off, allowing air to pass through the cylinders, but they’re actually closed to lock the air inside as the suction and compression apparently gives better elasticity for running engine-off.
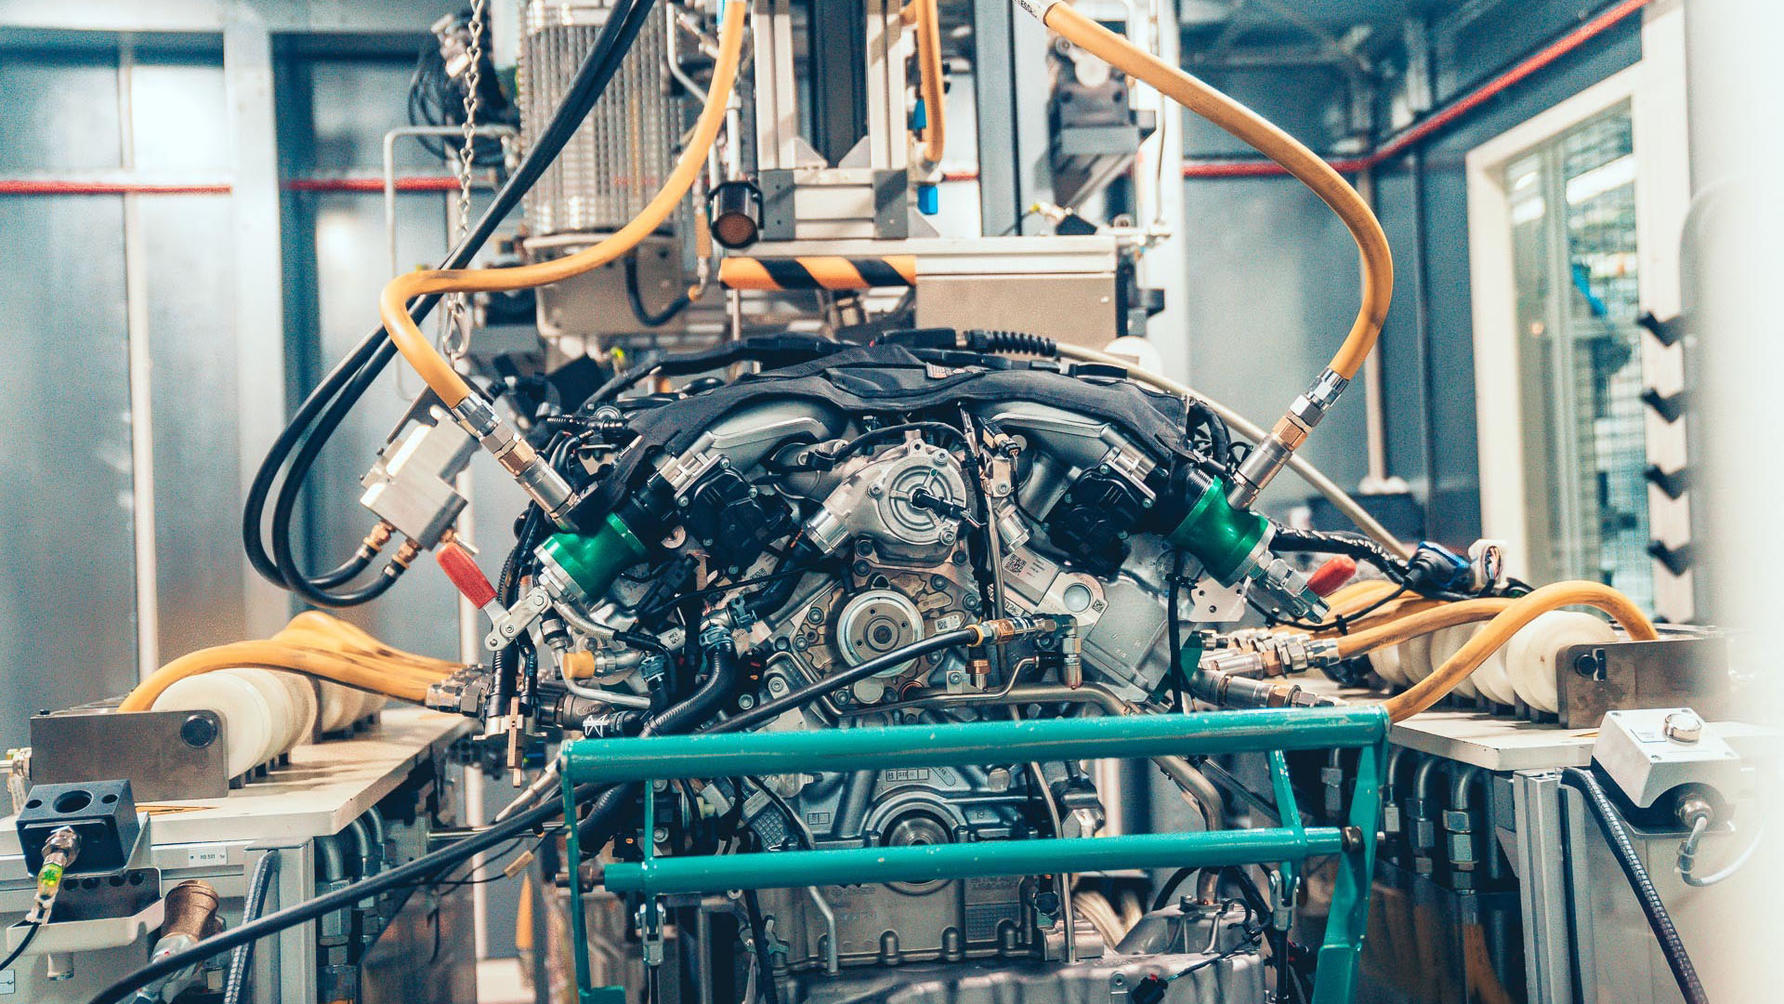
Right, I’ve skipped a load of steps: the plumbing basically. Pipes that lead from place to place, exhaust, cooling, timing belt and so on. I didn’t even attach the turbos, because they arrive as part of a sub-assembly and are just bolted into position.
This is not a finished engine, though. This is cold testing, where the engine is filled with fluids and turned by an external motor to check for leaks. It then goes back onto the production line to be finished, sent for hot testing – every single engine Bentley makes is tested.
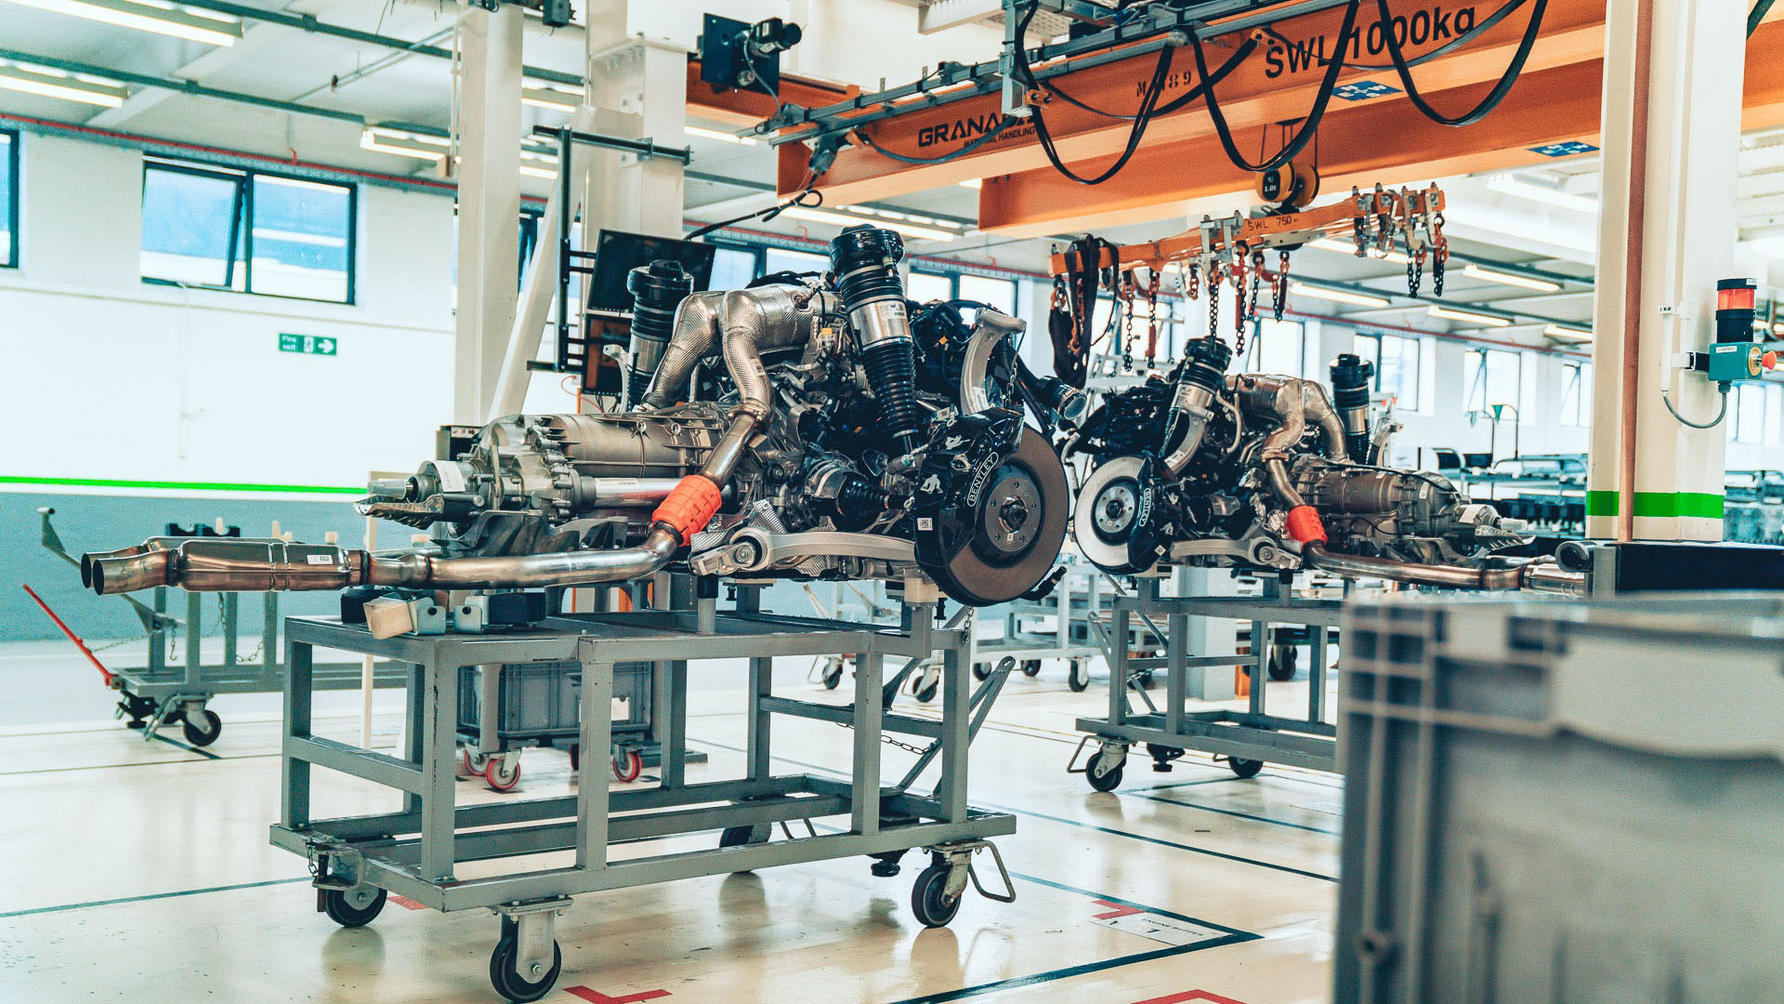
So here it is, a drivetrain ready for a car – our car. Don’t get me started on the gearbox – like the V8, that arrives ready assembled from Germany. Or the front suspension assemblies. Ditto. It’s the engine we care about here. An engine that deep inside, I’ve played a part in building. Let’s just hope it develops 626bhp at the end of all this.
Thank you for subscribing to our newsletter. Look out for your regular round-up of news, reviews and offers in your inbox.
Get all the latest news, reviews and exclusives, direct to your inbox.
